Blackberry Freezer Jam Recipe
Blackberry freezer jam recipe. Learning self sufficiency and preparing for emergencies doesn't mean just stocking up on the necessities. Mind you, the necessities are the most important, but don't forget the comfort foods, the things that will bring psychological comfort as well as nutrition
Why Freezer Jam?
You could settle on store-bought jam, but those jams you get from the local grocer typically have artificial preservatives and added sugars that your body doesn’t need. Plus, freezer jam isn’t cooked. It’s made with fresh fruit, so you get more nutrients and you preserve the fruit’s natural flavors.
With freezer jam, you get more antioxidants and vitamins than you would find in cooked, store-bought jam. If you prefer a less sweet jam, you can add less sugar.
A Frugal and Delicious Jam
Making your own freezer jam from scratch is also a great way to save money.
One way to do that is to stock up on bulk pectin and then make jams from fresh fruit you grow yourself.
We have wild blackberries growing on our property, and every summer I
usually get enough blackberries to make a year's supply of freezer jam
for my family. If you don't have blackberries growing on your property,
ask around.
There are usually people who have them who don't have the
time to pick them. Offer them a jar or two in exchange for the berries. There
are also blackberry farms where you pay a fee and then pick berries. It
would likely still save you the cost of buying frozen berries.
This year, I lost my recipe and couldn't find one on the web, so after
tinkering around a bit, I found a recipe that makes a nice jam that sets
up well.
This recipe makes about two and a half pints of jam.
The Right Containers for Your Jam
From picking the berries to making the jam, you’re putting in a lot of effort to make this delicious jam. There’s nothing worse than your jam getting freezer burned. Protect your jams by choosing the right containers.
It’s always best to place your jam in small containers. Put jam in a container that is more than half a gallon, and the fruit will freeze too slowly. Instead, store your jam in smaller containers.
You don’t need those cute jars with ridges, but you will need containers that are rigid with straight sides. Don’t use cardboard containers, or your jam will quickly get freezer burned. Also, don’t use regular glass jars because they can easily break at freezer temperatures.
If you don’t have anything else, you can use freezer bags. Freeze them flat on a baking sheet, and then you can easily stack them like books in your freezer.
No matter what container you choose, be sure to mark the contents and the date you prepared the jam.
Blackberry Freezer Jam Recipe
- 2 1/4 cups of blackberries
- 4 cups of sugar
- 1/4 cup of pectin OR 1 package of Sure Jell pectin
- 3/4 cup of water
Getting Started
Sterilize your jars by filling them with boiling water and then drain.
You will need about two pint jars and one half-pint jar. Set aside your clean jars.
Measure out your sugar and set it in a separate bowl.
Then place your blackberries in a food processor and run the processor for about 30 seconds until your blackberries are crushed.
Place the blackberries in a large bowl and gradually add the sugar, stirring until it is well mixed. Then allow the blackberries and sugar to set for 10 minutes, stirring occasionally. The goal is to make sure the blackberries have incorporated all of the sugar.
Preparing the Pectin
At the end of the ten minutes, mix the pectin and the water in a
small saucepan.
Bring to a boil, stirring constantly.
Once it reaches a full rolling boil, allow the mixture to boil for one
minute and then add the pectin to the fruit/sugar mixture.
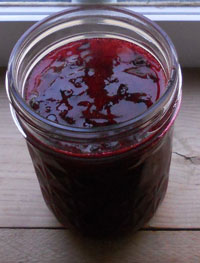
Stir for a full three minutes until the mixture is well blended, and then quickly add the jam to your clean, sterilized jars.
If you have a vacuum sealer
with a jar sealer, your vacuum-sealed jam will last up to two years in the freezer.
Learn More About Frugal Cooking
Return from Blackberry Freezer Jam Recipe to the Home Page
About the Author
My name is Sue Merriam, and I began the journey of self-reliant living more than three decades ago, which enabled me to stay home with my children. Fifteen years ago, I founded Joyful Homesteading to help others save money and face the future without fear. My goal is to give you practical, honest advice so you can save money and experience the joy of simple living. I hope you join me.
Recent Articles


-
Homesteading Legal Restrictions in HOA Communities
Aug 31, 26 05:48 PM
 Homesteading legal restrictions in HOA communities is possible, but check with your HOA and local laws.
 -
Solar Batteries for Emergency Backup During Outages at Home
Aug 19, 26 12:23 PM
 Learn what solar batteries can realistically power in an outage, how long they last, and what works best for you.
 -
Facts About Solar Panels
Aug 15, 26 10:30 PM
 Facts about solar panels are good to know when considering solar power for your off the grid homestead.